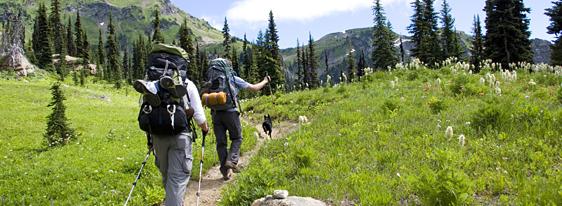
Backpacking is a great pastime, but an expensive one to get started in. Here are some great tips and
ideas to help you get started building your gear without going broke.
Click on any of the images to view a larger photo
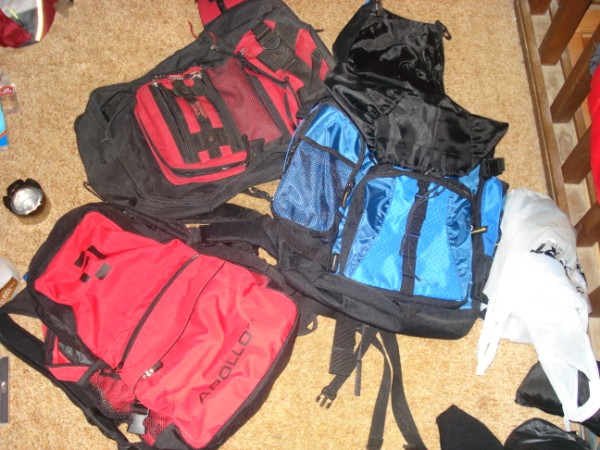

Backpacks - These
are a few small daypacks and book type packs that I picked up at the good will
for a dollar a piece. You just cannot beat a price like that for a nice
backpack. These actually have a waste strap. Most of these are excessively small
for my needs; I keep them for my youngest son to use.
You can go to the extreme of cheap if you wish, and use a
standard school backpack. They are a dollar or two at the local thrift store. I
would recommend that if you are going to make backpacking something that you
want to enjoy, I suggest that you spring this one time for a decent pack. It
does not have to be one of the many name brand packs, just an average pack to
suit you size and needs. One major difference between an actual backpack and a
school pack is a waste strap. This simple little addition to a backpack is more
than likely going to save you a tremendous amount of pain and suffering in the
long haul.
The waste strap is designed to take the weight off your
shoulders, where as a school pack is going to place all of the weight on your
shoulders. Going cheap on this item is something I do not recommend. Buying a
real pack does not necessarily have to cost a fortune either, there are many
options on the internet to hook you up with some great used or discounted
backpack. One site in general would be E/BAY. I picked up my first pack for about
25.00 new. It really did not fit quite right, but it served its purpose well
enough.
Just make sure you know what you are looking for, before you place a bid
on something that you are not sure is what you want. One size does not fit all,
so it is very possible that you could end up with a pack that looks great, but
fits terrible. There are base measurements for backpacks; usually they measure
from the seventh vertebra (the Knot at the base of your neck) down to around the
top of your hips.
18" is considered (small)
18-22 (medium)
22 plus (large)
The size of the pack is usually determines how you are going to use it. A larger pack will obviously hold more gear, which also means more added weight.
Winter and long distance hiking are two reasons that you may want a larger pack. Winter requires more clothing, blankets and other amenities, just as long distance requires more food and water for longer hikes.
Either way you go, you should be able to find something to meet your needs.
Another suggestion would be to join a forum of hikers who trade or sell things amongst each other. You can get a pretty good deal on some good used equipment and also have an open lane of communication between buyer and seller, where as E/BAY has become so automated that the buyer and seller never have to talk at all. If you are looking for the ultimate in deals, you should join a great community called Freecycle. If you are looking for something in particular, you can post a message to the group
In addition, if someone has that item they can offer it to you at no charge. Freecycle is based on the idea of recycling items
that would normally go to the landfill, by giving it to someone who may still have use for it. It is not just a free stuff site, there are rules that are very strict, but generally, if you abide by an average code of ethics, then you will be able find what you may need and also provide something to someone else that you no longer need.
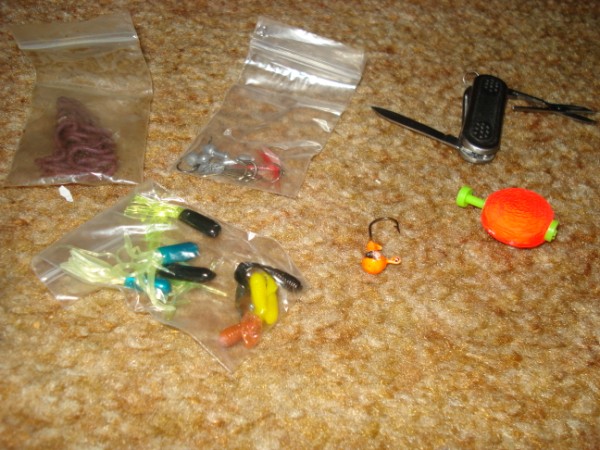
Fishing - If the time of the year is right and you are near a lake or river, you may want to take a small tackle kit. My kit is very simple and has everything I need for basic pan fishing. The kit consists of a small cork bobber, which adds almost no weight at all, one jig head and a few miscellaneous jigs. One thing I picked up at the local bait shop that has been useful are some imitation worms.
They look and feel just like real worms and they are almost impossible for fish to get off the hook. They come in a small jar; I just took a few out and placed them in a small zip lock bag. I also spray them with a pan fish scent before I head out. They work great and as long as the fish keep biting, I will keep them in my tackle kit. The knife I keep in the kit because I like it. It is not necessary to have a knife, you more than likely have one elsewhere is your gear that you can use. I keep it in the kit for my own preference.
Depending on your fishing preference, you may not need
any of the items shown here, by some standards it is over kill. I could probably
get by with one jig and a hook, but what fun would that be?
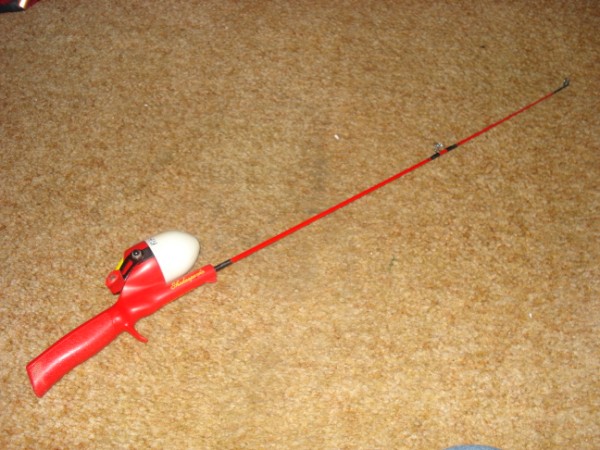
Fishing Pole - my pole is nothing more than a kids
fishing rod, they are about five dollars at Wal-Mart or Kmart. This one is mostly
plastic and is very light and it serves its purpose very well.
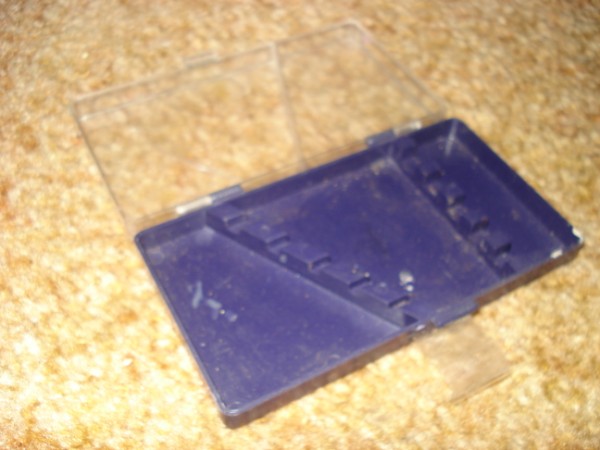
Tackle box -
The "tackle box" is actually from a small screwdriver set. I used it because it
fit my needs at the time, although any small container should work ok
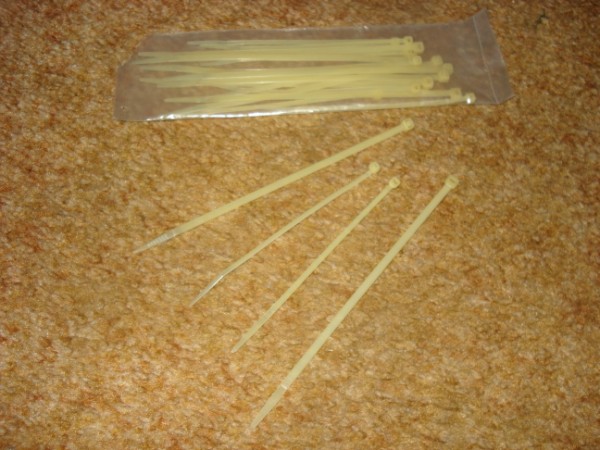
Tie Straps- Tie
straps are very useful for many different things. My primary use for them is to
add loops on my back, although I have used them for other things. I usually keep
two or three in the top of my pack. They are very common and can be found at any
dollar store or hardware store.

Hiking sticks-
Hiking sticks or hiking poles, what ever you want to call them,
are one of greatest assets to have on a hike.
They have proven themselves worthy many times over for me.
One of the best things about them is they are plentiful. As your walking along
the trail, you are sure to find a limb lying around that will serve as a nice
hiking stick. Have an old broom or mop? They make great hiking sticks also.
Hiking sticks can be made from just about anything you can think of; I made the
one shown in the photo from some old graphite tent poles I was not using. The
handle is made from neoprene. Many people use their hiking poles for many
different tasks on the trail, they help keep you balanced when you are crossing
a stream, or crossing uneven terrain. They also reduce the muscular impact and
strain on your legs, back and feet.
They help me to keep
low-lying branches out of my face, and if it is an early morning, I will use it
to clear the spider webs that cover the trail. I even have an attachment for my
camera so I can use it for a tripod.
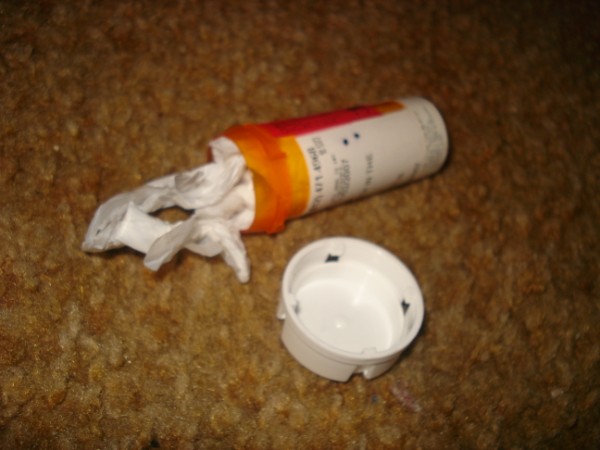
Pill bottle
containers- Pill bottle containers are small lightweight and very
useful. They are also very durable. I use them to store different items like
matches and plastic bags for trash. If you take a medication, or know someone
who does, tell them to save them for you, you might want to consider them as a
useful item to have in your pack.
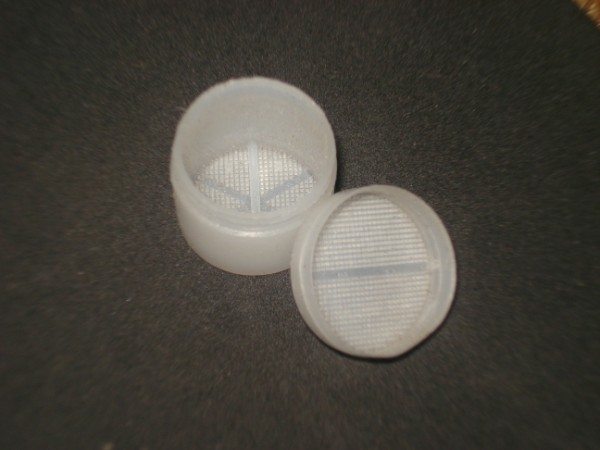
Med holder - These
are actually used in prescription bottles. The are filled with a silicon
material that will absorb moisture. This one actually has a lid, so I use it for
my daily meds that I need easy access to. Very handy, and doesn't take up a lot of room.


Clothing - If your not worried about the fashion police when you are on the trail, then I would suggest you stop by your local thrift store and browse around their clothing department. You would be surprised what you may find. I usually go hiking in the fall and early spring. I live in the mid west, so the temperatures can vary from day to night by as much as 40 degrees. In the daytime, I will usually have on shorts and a t-shirt. At night, I usually break out the layered clothing, which consists of a nylon t-shirt, nylon long sleeve shirt, long underwear and nylon pants. I also carry a nylon jacket and a fleece vest. All of these items are available in some form at your local thrift store, all of my clothing, excluding the long underwear, came from my local thrift shop
Condiments -
Condiments are easy to come by if you know the right places to look. I usually
purchase some of the items shown, but most items like salt, pepper, ketchup,
mayo, relish and sugar can be picked up at local restaurants. Next time you out
grabbing something to eat, just ask if they have something you need.

Plastic Containers -There are a wide variety of containers you can use as food containers. I like the 35mm film canisters, although you really have to clean them out good due to chemicals from the film. I use them for chicken and beef base. I used an old container of vanilla to store my cooking oil. Look around your house; you will be surprised what you can use for a container.
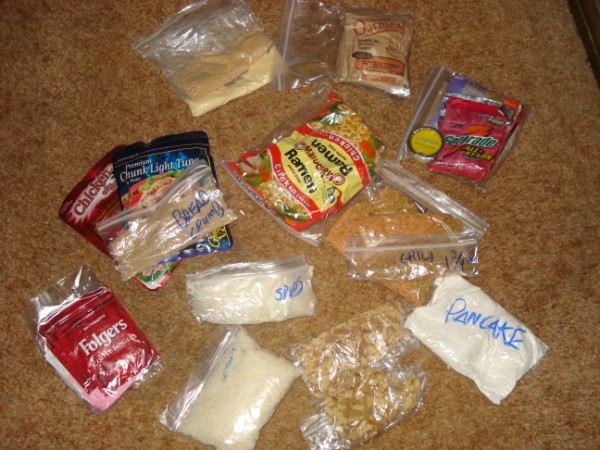
Pack Food - backpack foods are available in many different forms. some people are content with just ramen noodle and soup mixes, where as others want to be a little more adventurous. The variety is endless, it's up to you to choose the right types of meals that will keep you sustained on your hike. I have a few meals that I enjoy making when I am on the trail.
I enjoy the creative part of cooking as much as anything else, most of my hikes are pretty short 1 or 2 night trips from 20 30 miles in length, so i don't really have to pack awhole lot of food. I do enjoy the raman noodles though, especially the chicken. Who can pass up a steaming bowl of hot chicken soup for about 10 cents a package ? If your looking for the cheapest meals out there, ramen noodles are a must on your list. Another great item is tuna in a pouch. It's flat, fits nicely in the food bag, and you don't have to drain any water off. i usually carry one for my lunch menu.
Salmon is also available in pouch packages, i also keep one for my dinner menu. Other meals i like to prepare are usually created from different types of quick stove top meals, like hamberger helper, mac and cheese, etc. These type meal can be picked up at any grocery store, name brand is usually about a dolllar a box and generic is usually about 30 cents cheaper. You can also mix and match ingredients to create your own custom meal.
Other items you may want to consider are, instant
potatoes, instant oatmeal, bagels, tortilla shells and stovetop instant
type stuffing. You can also buy ready made dehydrated meals at your local
outdoor store, although the price is a bit more and the quantity is not that
much. MRE, meals ready to eat can usually be obtained from any army surpluss
shop. like I said, the variety is endless.
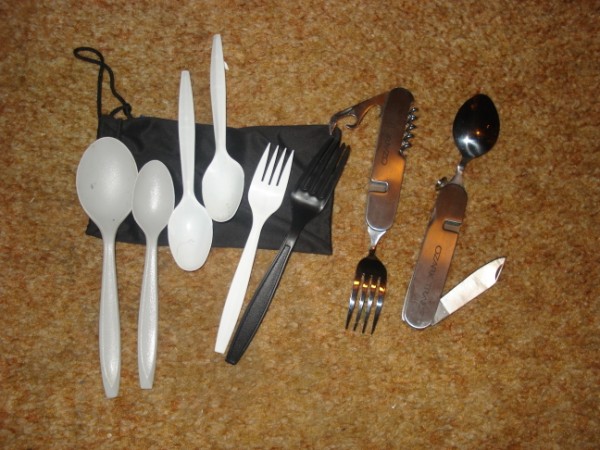
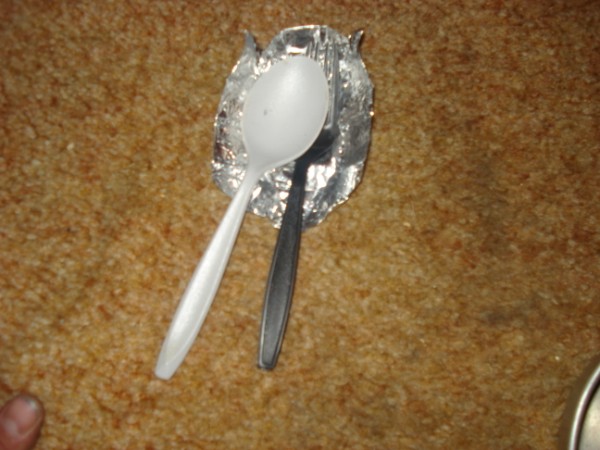
Eating utensils- Some say you do not need a fork, which is actually true, but it is totally your preference. Plastic utensils can be obtained from just about anywhere. Every fast food joint on earth has them. One piece of advice that might be helpful is this; some plastic forks are more durable than others are, some will break if you look at them wrong and others will be much more flexible. Try to pick up a few from different places and see which ones you like the best. One other thing about them is ALL off them are intolerant to heat.
As soon as you start poking your spoon or fork around a pan of hot fish or something, you will know what I am talking about. I recommend a Lexan spoon or if your not worried about weight, just take one from your drawer at home. I use the Lexan spoon, but .I usually carry one plastic spoon extra. I do not mess with forks at all.

Flashlights- flashlights have become more and more available at the local dollar store lately, especially the LED type. I love the led lights, they are usually small, light, and last an incredible amount of time. My favorites are the key chain lights and the book lights. The key chain lights are usually push button type lights that I can just grab and shine when I need to find something. The book lights are nice because they come with a clip that I can attach to the top of my tent. They also have an on off switch.
There was a time when options were limited for small
flashlights, now they are everywhere. I usually pick one up when ever I am at
the dollar shop.

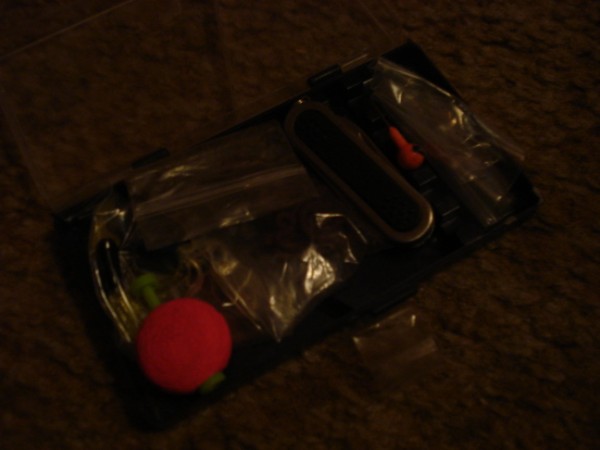
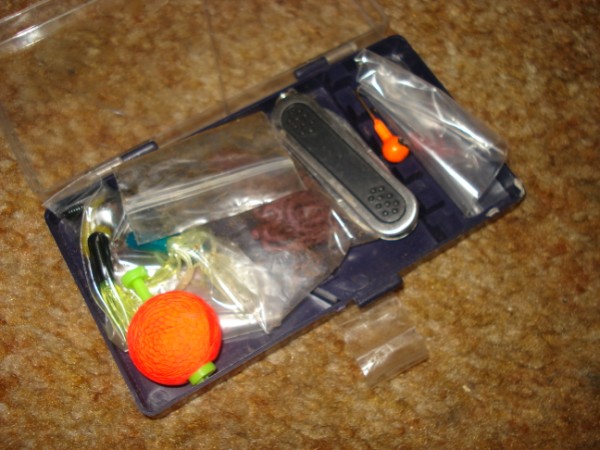
S
ewing kits - You
can get a nice little kit like the ones shown in the picture for about a dollar
if your lucky, I picked up the credit card sized ones at a local sewing shop for
about fifty cents a piece. This is one item that I will never leave home
without; it ranks high on my list of must haves.
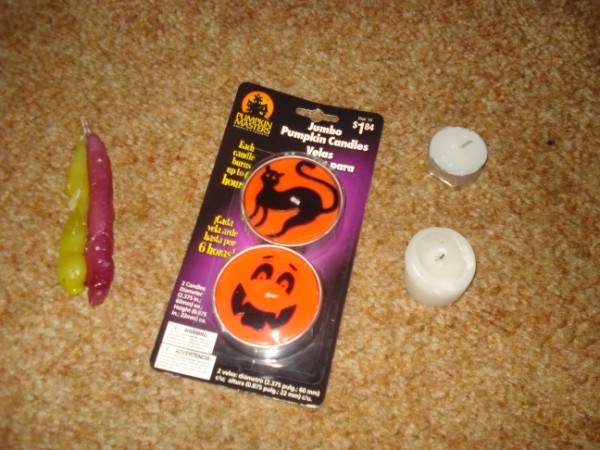
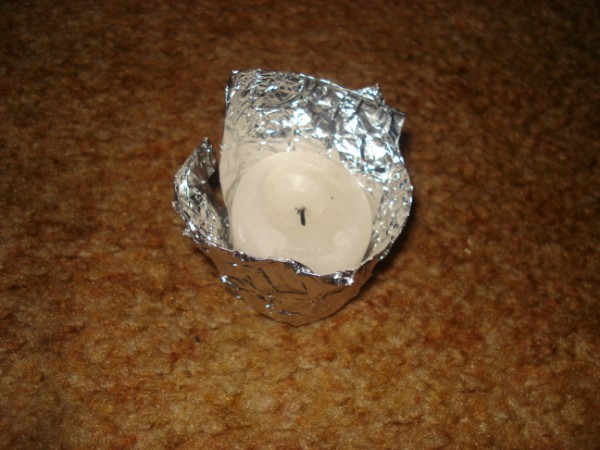
C
andles - cheap,
cheap, cheap. Candles are just cheap. An average tea candle is about 5 cents and
will burn for about 7-9 hours. I use them in my tent, not only do they produce a
nice light to read by; they also generate heat to help warm the tent. Another
good use for them is a fire starter or you can use the wax to seal a seam in
your tent that may leak. Personally, I like the light
they produce, it seems more relaxing than sat a LED
type light.
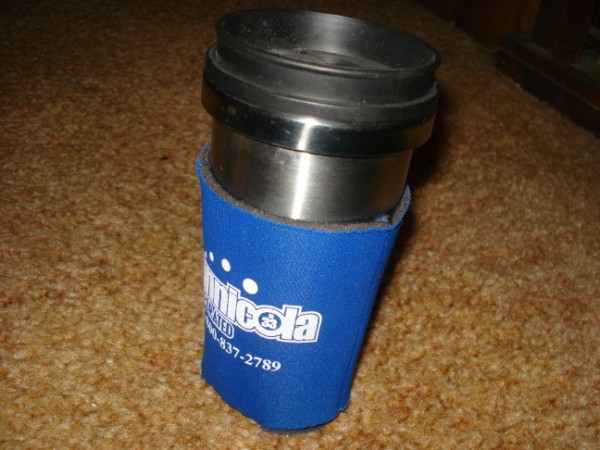

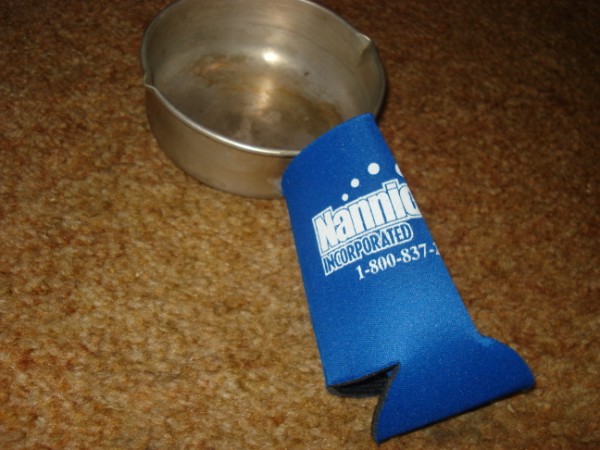
Potholder - Beverage
wrap
- In my situation, I find this item very useful. It is my
potholder and it wraps around my coffee up. If you are lucky, you can pick one
up for free from a local advertiser. I got mine from a local home show. They are
nothing more than an open or closed cell sponge material, which is very
lightweight. They are common because they are marketed as cheap tools of
advertising. I like mine because it has a multi purpose. I love item that can
serve more than one use.
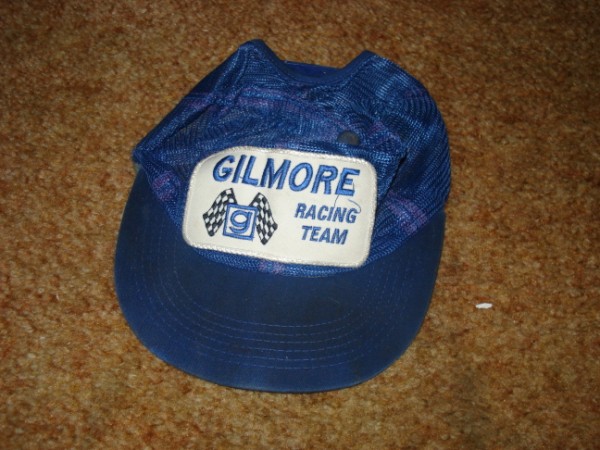
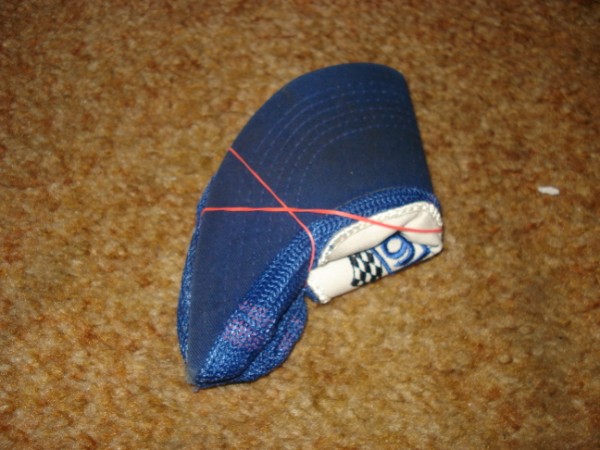
Nylon hat - You
can find a hat anywhere, if you are lucky you can find one of the older types
that have no cotton in them whatsoever. I have short hair, so the sun beats down
upon my cranium with a vengeance. I have had this hat since the 80's, it is an
old nylon mesh truckers had. I kept it for my backpack kit because it has been
worn and washed so many times that it very easy to fold up and store in my fanny
pack. Thrift stores would be my best choice for a cheap hat.
<DSC03671.jpg>
Shovel with TP and
bag - Little garden shovels are easy to find at any major retail store,
you can even pick one up at your local dollar store. They are considered a
seasonal item, so your best bet would be to hit the store around springtime. I
like this one because there is a hollow space in the handle that I can keep a
plastic bag in. The easier it is to keep items together, the less likely it is
that you will be rooting through your pack at the last minute. I am the worst at
this, so it helps me a lot.
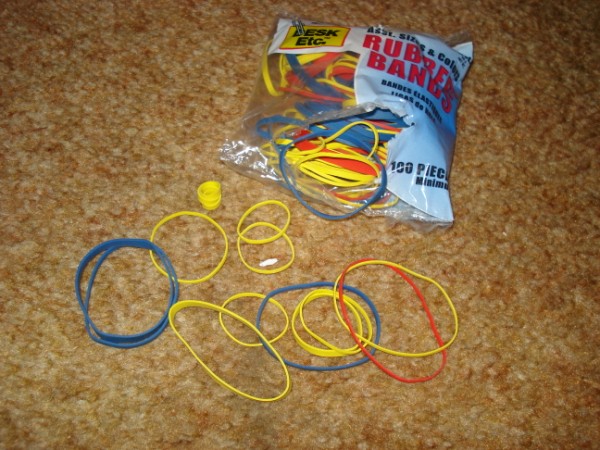
Rubber bands -
This is an item they you should have plenty of, you can usually find them
anywhere for under a dollar. They weigh nothing, so I keep a hand full in my
pack whenever I need one.
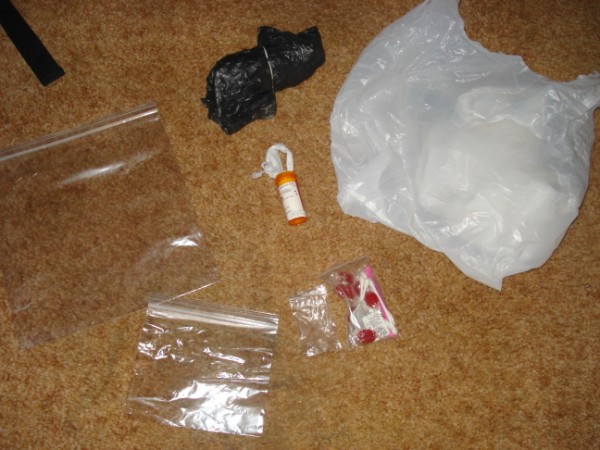 Plastic bags - Plastic bags are pretty much free,
all you have to do is go to any store and more than likely, whatever you buy
will end up in a plastic bag. On an average trip to the grocery store, you can
probably end up with ten or more bags. They are a multi use item as well.
Plastic bags - Plastic bags are pretty much free,
all you have to do is go to any store and more than likely, whatever you buy
will end up in a plastic bag. On an average trip to the grocery store, you can
probably end up with ten or more bags. They are a multi use item as well.
If you are lucky, you will be able to find some multiple
sized zip lock bags. I picked up a set at my local dollar sore that had four
different sized bags in it. They were very useful.
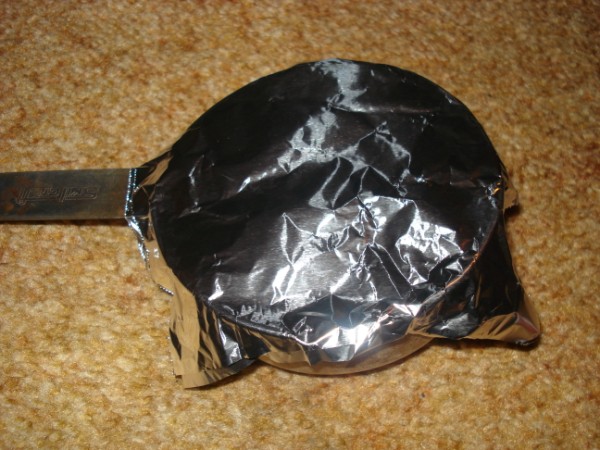

Aluminum foil
- Another multi useful item. Aluminum foil is cheap light and can be used
to replace many items in your pack. Such example are; a pot lid, spoon rest,
candle holder and stove snuffer. It's an easy item to
carry; I just fold it up and place it in the bottom of my cook pot.

First aid kit -
Fist aid is something I don't like to skimp on. I try to keep everything that I
may need in case of an emergency. I use an average sized school pencil bag for
my carrier and it suits me fine. Nature is beautiful, but you can get some nasty
infections from the organisms that live in the forest. It's not something I take
for granted.
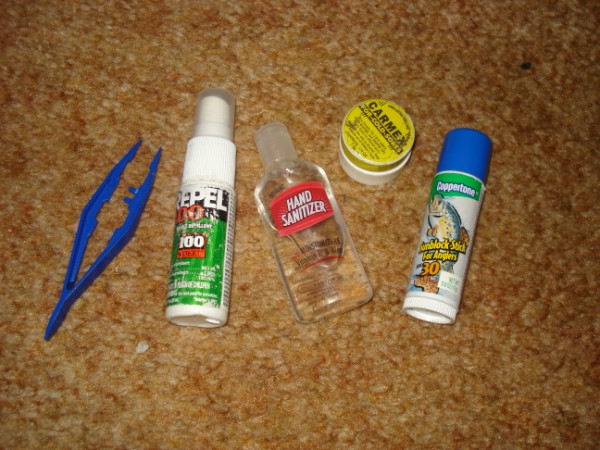
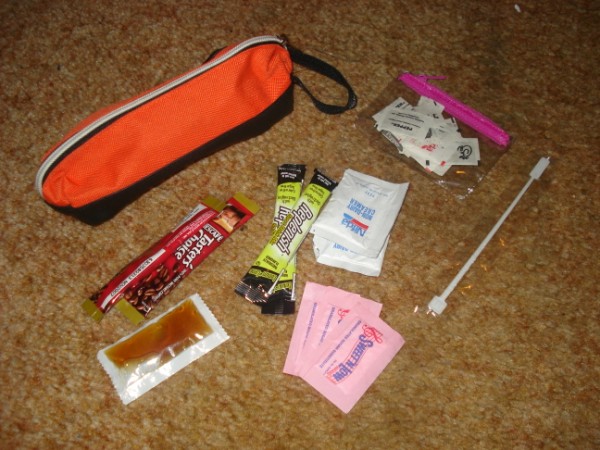
Bug spray, sunscreen, and misc -
Mosquitoes, ever heard of them? Around here, they are big, they are mean, and they are plentiful. Not to mention, they are stealthy, stubborn and annoying. Everyone hates that ever familiar sound of a mosquito buzzing around you head. It conjures up feelings of anxiety and, in some cases, sheer terror. I have actually fled an area before, just to avoid being their lunch. There are many varieties of Repellent on the market, the most popular and most effective one contains a chemical called DEET, but there are other types of natural ingredient based repellent on the shelf.
One common misconception about bug spray is that it is being absorbed into your blood stream, and poisoning your body. Trust me; everything you touch on a daily basis has the potential to make you deadly ill. There are probably more bacteria in your kitchen sink that are more likely to cause you harm, then any bug spray will. When used as directed, bug spray is no more harmful than any other product we apply to our skin on any given day. You just have to use your head, read the instructions thoroughly, and take into consideration things like, the length of time you are going to be outdoors, the time of year, etc.
My repellent of choice is Deep Woods Off, I tend to stay out longer and sometimes hike into the evening hours, when mosquitoes are at their worst. Other considerations to keep in mind are as follows:
Apply repellent lightly, heavy coverage does not provide you any more protection.
Wash your hands before eating
Do not spray the product on your face, spray it on your hands and wipe it on your face, keeping it away from your eyes and mouth.
Check recommended usage for children. Do not let them apply it to themselves; children have a tendency to stick their hands in their mouths.
Do not exceed the recommended usage.
Try to keep from applying repellent to areas of broken skin or areas that have a rash.
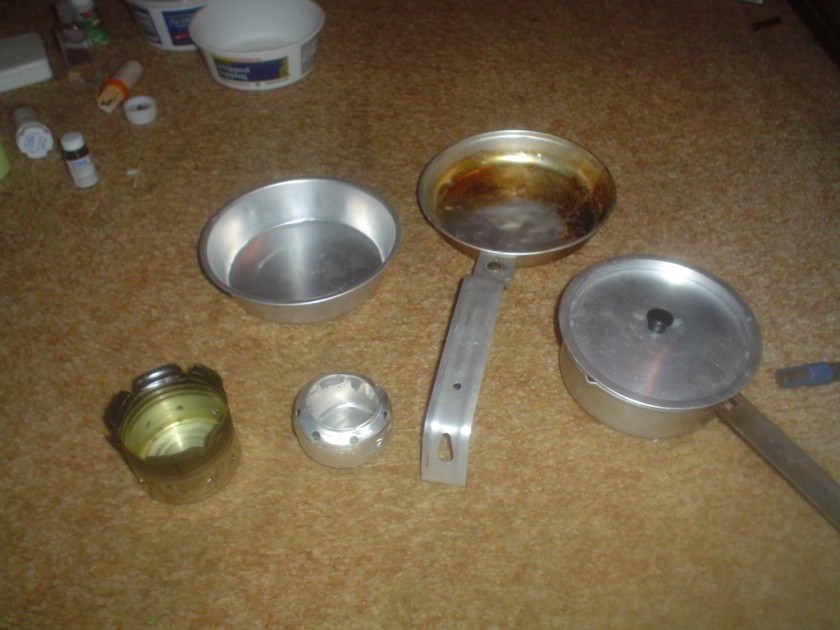

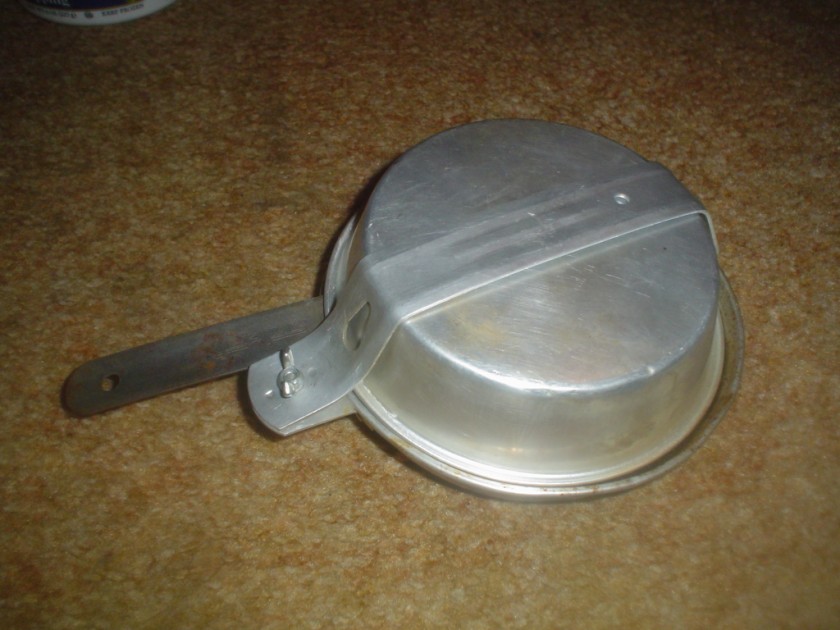
Cookware - If you plan to cook, you are going to need some sort of pot or cook set. The cheapest set available is an aluminum camp set that they sell at Wal-Mart or Target. They usually cost around five dollars. I use this type of kit in my pack; the only change I made was to get rid of the stock pot that came with it. I replaced it with an aluminum pan I picked up at my local thrift store. The original pan is ok, but the design has too many sharp bends in it at the base and it does not heat up water as fast as the pan I replaced it with. They sell a heavier steel camp set which will probably last a lot longer, the only draw back is the total comparative weight of the two sets. If you are looking to save a few dollars, then I would suggest the aluminum set. Depending on your cooking habits, you may not even need a cook set. If not, I would suggest you stop by your local thrift store and see what they have to offer. It is amazing what you can find sometimes.
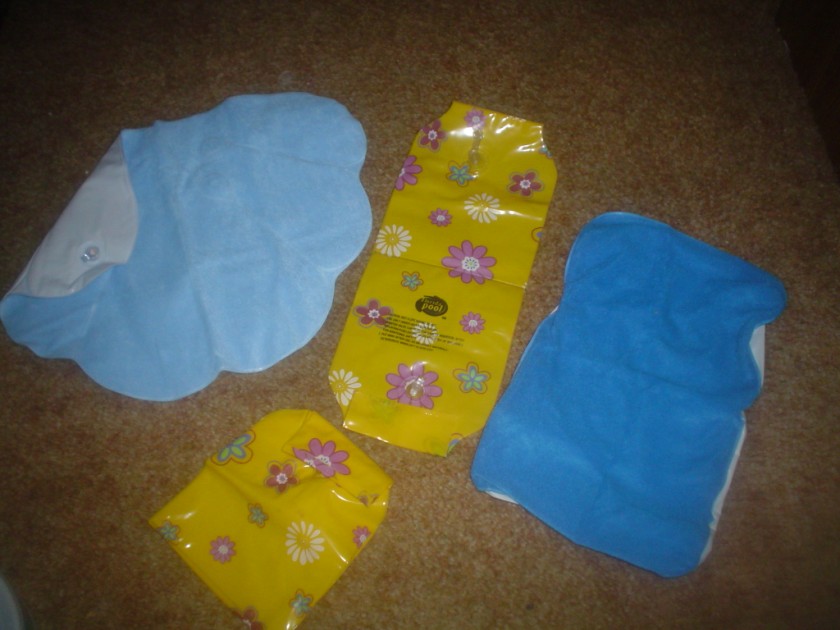
Pillow options -
pillows are really a matter of choice. Most people will tell you including
myself, that they do not carry a pillow because they usually use their clothing
sack. If you feel you need a pillow, one of the cheapest of ideas would be to
pick up a set of arm floaties at the dollar store. The cost is about $1 to
$1.50, and if you cut them in half you will end up with two small compact,
lightweight pillows. Other options , as shown in the photo, is an inflatable
neck rest for a bath tub, and an actual inflatable pillow that I picked up at
target in their dollar deals section.
Plastic containers
- if you are looking for cheap storage I would suggest you take a tour of your
own home. I am sure you can find something that will suit your needs. I use the
empty pill bottles; I find them to be useful for my needs. They are not made to
be watertight though, if you were looking to put liquid in them, I would
recommend you find an alternative container of choice. I keep plastic bags,
matches and emergency change in mine. I like them because the lid stays locked
on, and they are free.

Beverage cups -
you should really only need one beverage cup. I enjoy coffee and hot chocolate,
so I prefer to use a small thermal cup that I picked up at the thrift store and
added some insulation around it. My cup of choice now is also a thermal cup, but
I modified it to be multi purpose. Once I took off the plastic cover, I realize
it had a stainless steel base. I like it because I can boil water in it or
reheat my coffee without having to pour it back into another pot
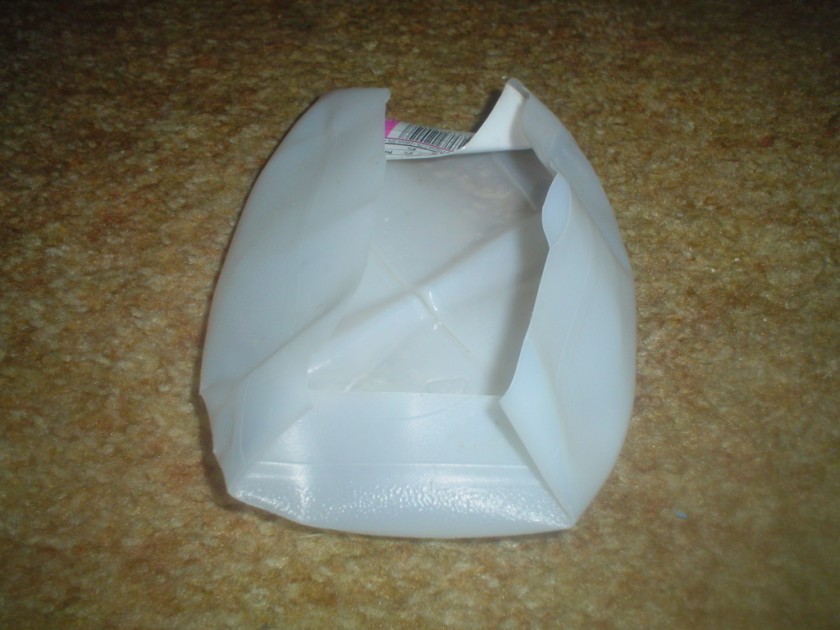

Milk jug bowl - This is an Idea I had for using a milk container for multi useful container. Basically, it is what it looks like, the bottom of an HDPE milk container. All you have to do is cut out the bottom to suit your needs. I cut mine with some holes oh each side, that way I can tie some cord or use some of the Caribbean hooks as handles. If you make the holes big enough, you may not need to add any additional hardware for the handles.
One thing I like about it is anyone can make one. Everyone drinks milk, and if they do not, they surely know someone who does. Another great feature is flexibility. You can fold the sides down and make it almost flat. It is light, cheap, multi useful.
Use it to wash your dishes, or you can use it as general washbasin.
If you near a lake, you can use it to transport water to put out your fire.
Use it for a bowl, to eat from or mix other food ingredients.
Put it in your tent and use it to hold items that you keep in your pocket like your keys, lighter, change, or cigarettes.
There are many things it can be used for; I mainly use it for carrying water to put out a fire, and to wash my pans after a meal.
One downside HDPE is, it does not like to be folded and unfolded for very long. It will also become brittle in colder temperatures; it will crease and start to crack. It may be possible to extend the usage by placing duct tape of the folding points although I have not tried this
My advice would be,
Only take it if you plan to use it.
Unfold it upon arriving at camp
Keep it unfolded at camp or while storing it at home.
Drink more milk.
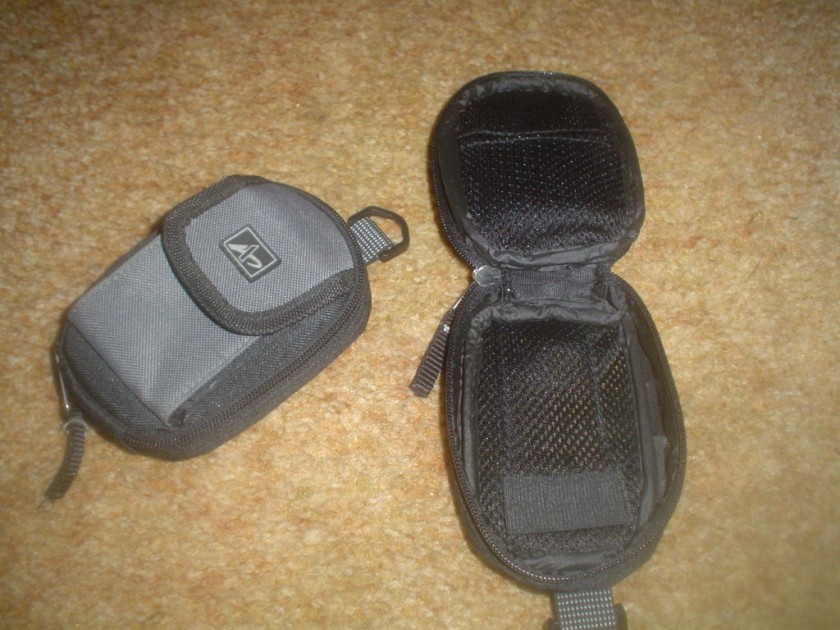
Camera bag - one
good thing about certain dollar stores is that they sell stuff that was once
name brand merchandise. This camera bag may have been designed for a high-end
camera 3 or 4 years ago, but is now just useless overstock inventory. It works
out good for people like me who are looking for an alternative use for things
anyway. I use it for my binoculars; they fit in the pouch as if they were made
for it. Therefore, I got a great useful item at an extremely discounted price.
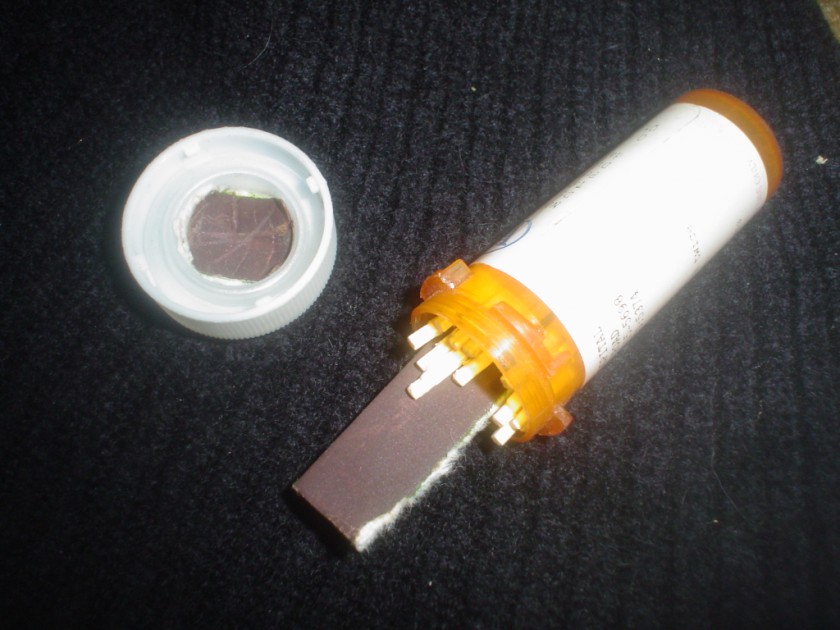
Pill bottle match
holder - If you cannot tell already, I like empty prescription bottles.
I use them for match holders. this is not a design that t is suppose to be water
proof, I have a separate water tight match holder that I keep for emergencies.
this was just an idea that worked out for me so I can keep all my gear together.
I cut a piece of the striking material and placed it in the lid, and cut a strip
to place inside the bottle with the matches. I am sure there are other small
containers that are much better suited for this, but it works for me because I
have access to many of these bottles. I try to make use of them whenever I
can
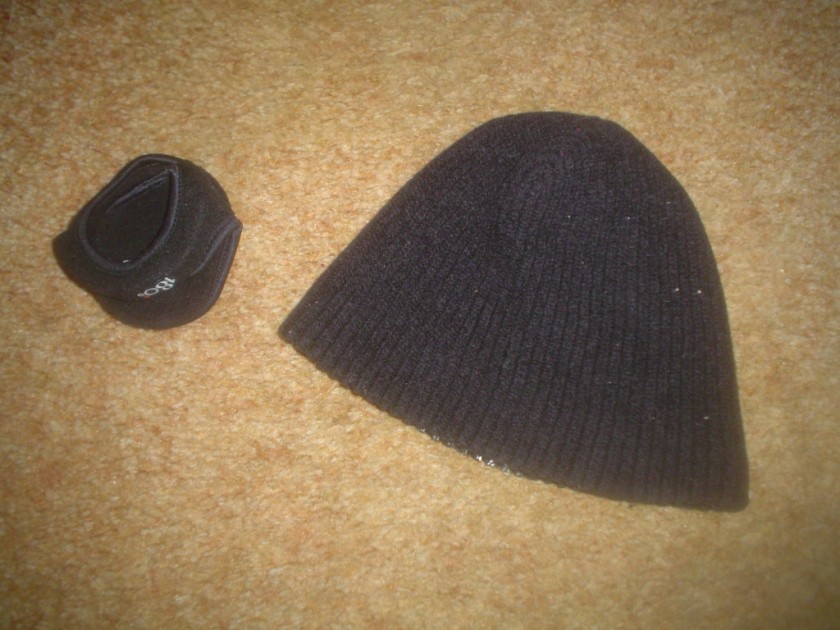
Sock hat, Earmuffs
- Depending on when you like to hike, you may want to use a sock hat or
earmuffs. Since I like to hike in the fall and early spring, the morning
temperatures can get pretty cold. I usually take the muffs and the sock hat, the
hat can get rather hot at times, where as the muffs are protecting my ears,
which are usually the only thing that gets cold anyway. You can pick up these
items at any dollar store also.
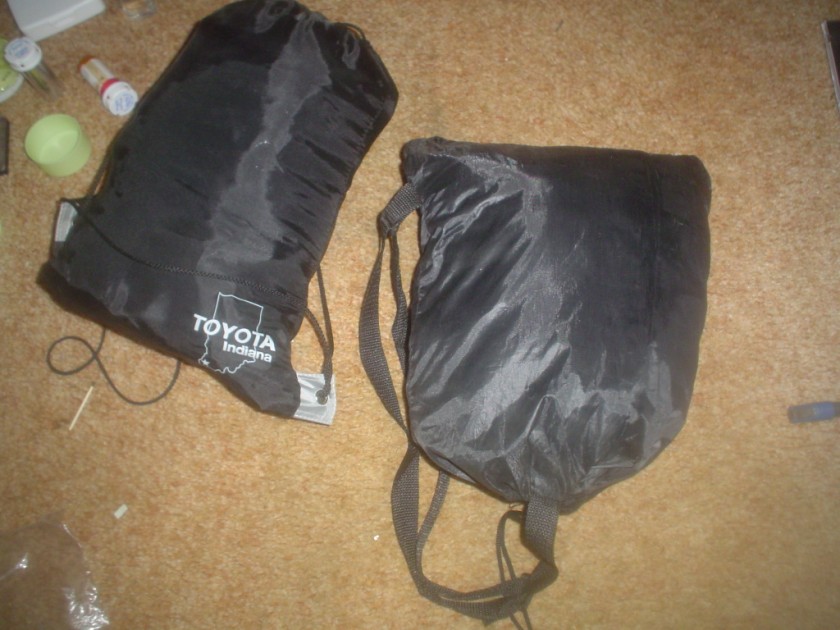
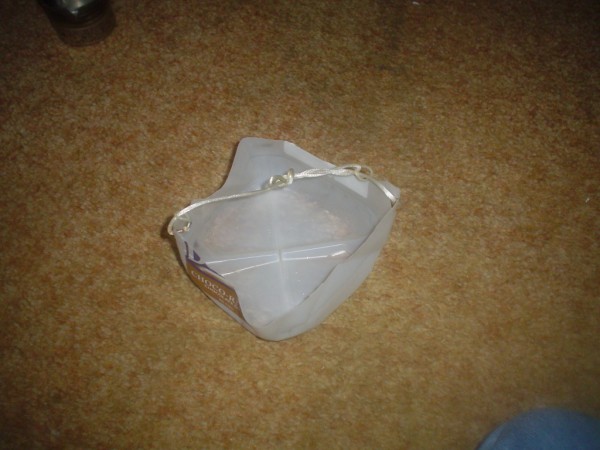
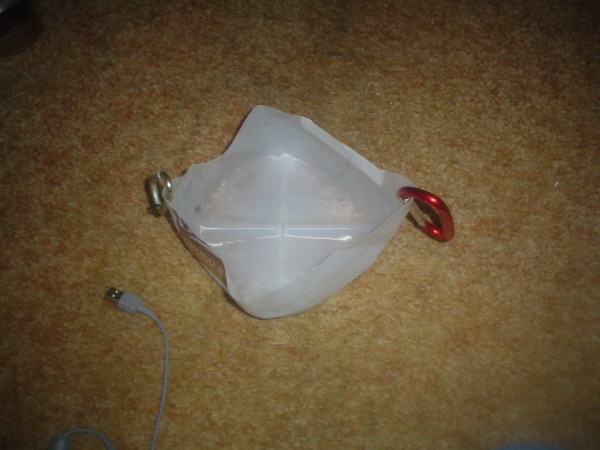
Stuff Bag - Stuff
bags can be fasioned from anything. I found
great use in
some of the promotional backpacks, like the ones in the
photo. I also found this nylon type bag at the dollar store
which has
a zipper compartment. These two items
work well for me, and since one
was free and the other was a
dollar, I'm not complaining one bit.
Other Ideas you might want to think about are the
plastic grocery
bags, although, they are not very
durable unless you double or
tripple them. If you can
sew, the option are unlimited for you to
make your own.
I have made a few from the sleeves of nylon type
pants and jackets I picked up at the thrift store. Just sew
on end
shut, stitch in your own draw cord, or just tie
the end with cord.
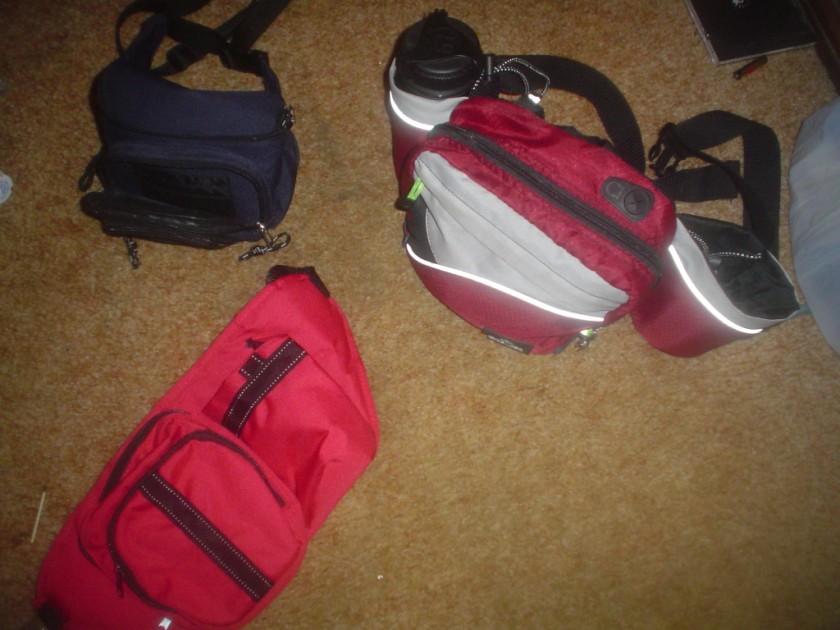
Fanny packs - a fanny pack is a must for me. I have so many things that I need on the trail, and having them right where I can get to them is very helpful. it also helpstake some of the weight off my pack. you can usually find them at any thrift store. i went the extra mile for mine at walmart. it has multiple pockets and 2 places to put water bottles.


Rainwear- Rain wear comes in many flavors. If you want to go the cheapest route, you could use a large trash bag by cutting out holes for your head and arms. Just like everything else I own, i picked mine up at the thrift shop. They seem to have an endless supply of lightweight waterproof clothing. They were very stylish to wear for a while, but they have all seemed to find their way to the thrift shop. The jacket I bought makes me look like a flashback to the 80's, but I do not care, it serves its purpose well

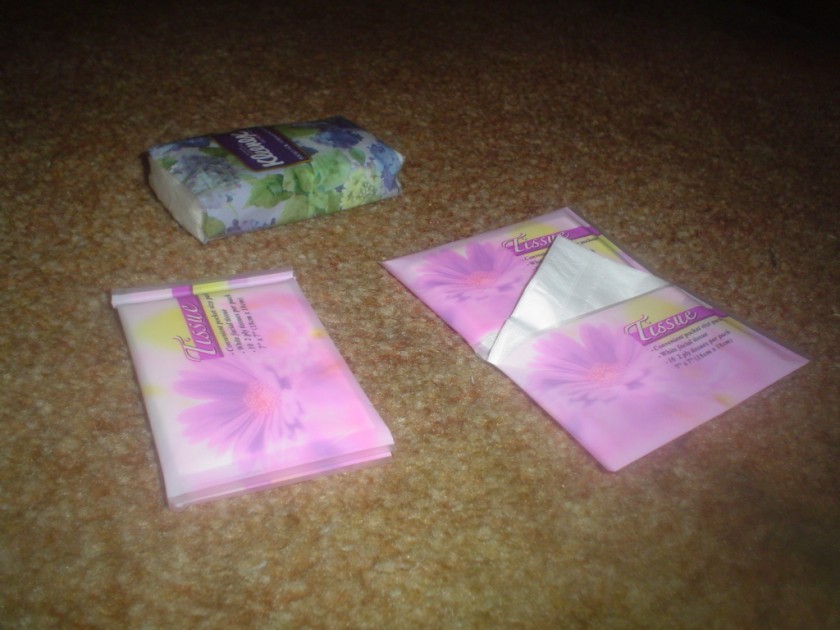
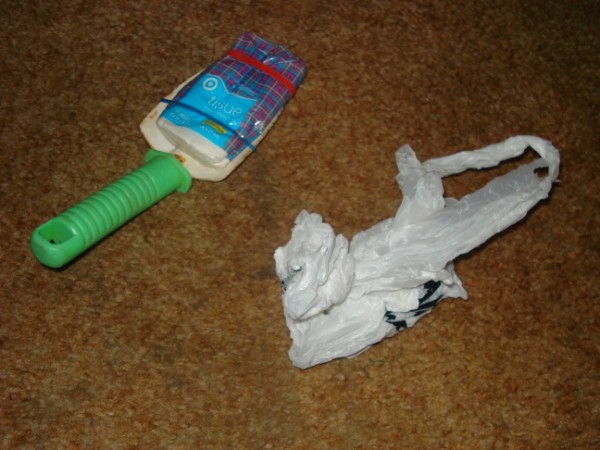
Tissue packs -
These things are quite convenient, I keep one pack to use as toilet paper, one
in my food bag for napkins, and the smaller packs fit well in my fanny pack.
This is yet another item that can be purchased for around a dollar at your local
dollar store.
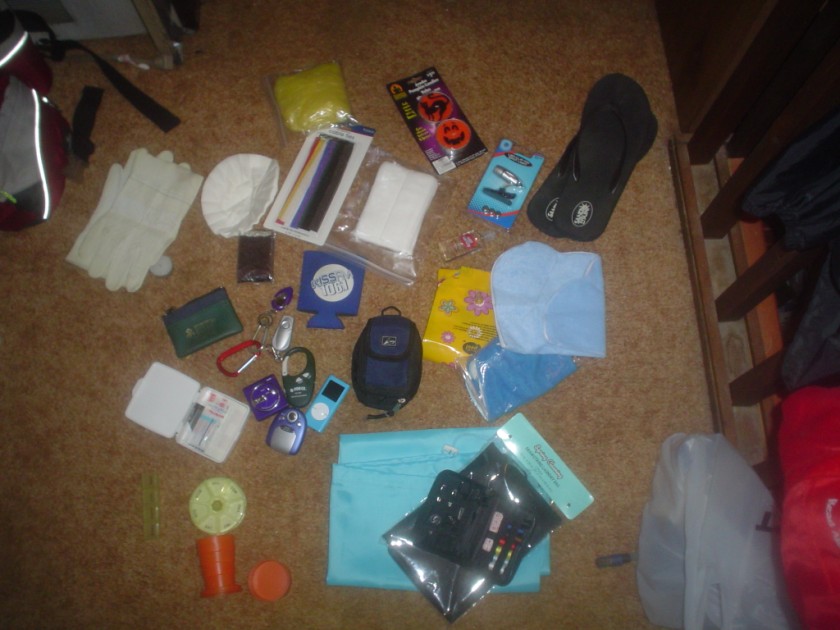
It's a dollar
! - everything in this photo was purchased for a dollar or less.
Some of it is nothing more than your basic Chinese made items, but a lot of it
serves a useful purpose regardless.
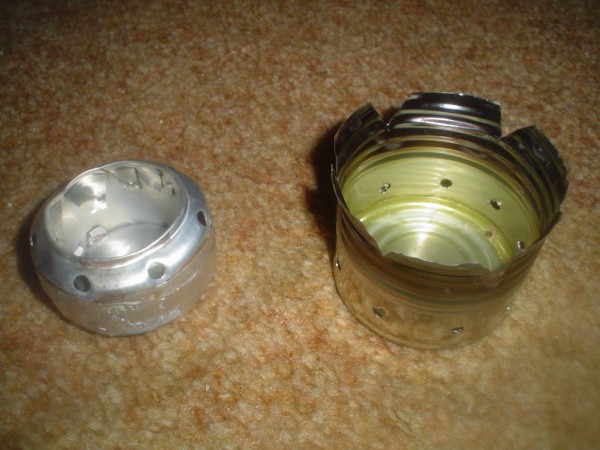

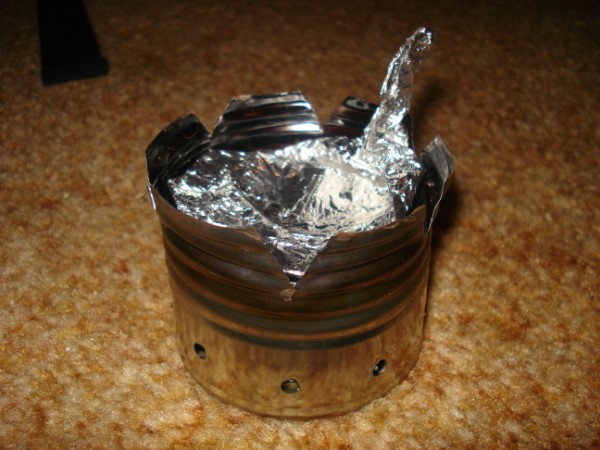
Stove and Windscreen - This is my windscreen / pot stand that I use every time I go backpacking. The great thing about this design is how you can use it for many different applications. I use it for my pot stand and wind screen exclusively, but it can also be used as a wood burning stove. I have used it with my coffee cup, which is a stainless steel. I tossed in a few hot coals from the fire and just sat my cup on the coals. It really worked well at keeping my coffee nice and warm.
The design is simple enough. Just find a can good can and cut it in half. I drilled a few holes in the base to allow air to be drawn in. They are big enough to allow a smooth draw, yet small enough to keep the wind from blowing out the flame. Some cans may vary in size, mine is a basic green bean can without a tapered bottom. My alcohol stove fits inside nicely, and leaves plenty of room for airflow.
The grooves at the top are to allow the flames to rise
up and fan out. Originally, I had some 3/8 holes drilled into the top, but this
design allows me to bend the tabs outward and create a bigger base area.
Video
Articles
Homemade Gear Links
General Backpacking
Forums
Discounted Gear
Cool Stuff
Send us your your ideas and we will add them to the site.
Be sure to include a website address if you wish users to be
directed to your own site.